Advent of Code

As every year Christmas Holiday period has started and even if it’s a religious originated period, with passing of time it has become a way thorough which people share time and gifts with their families and friends beyond the religious original meaning.

Secret Sant, Advent Calendar and multiple other initiatives used to be a way to give, share, participate, approach to this event.

Advent Calendar it has always been one of my favorite. Every day from Dec, 1 through Dec, 25 you open a little box with a small gift (usually chocolate). It can often be a craft activity or a game to perform with your closed one or more expensive gifts.

This year, even though I bought a chocolate advent calendar for my family, I decided to go for a different type of calendar https://adventofcode.com/ Each day a small programming puzzles to get all fifty stars by December 25th and save Christmas and help the Elves find the sleigh keys they accidentally sent into the ocean!

I’m on day 4 let’s see how many stars I’ll find.

Happy Holidays Everyone!!!

Helper and Utility Classes in Java

In an object oriented programming model we can define a helper class as a way to provide some functionality that aren’t the main goal of the application or class in which they are used. A helper class can have instance variables and multiple instances as well. A utility class is a special case of helper class where all methods are static.

Usually Utility and Helper Class are used to do basic functions help so that developers don’t have to implement it multiple time. A general rule could be:

  • Utility Class: static class that can be easily accessed and imported everywhere. In order to prevent instantiation of a Utility class a common practice is to make the class final and create a private constructor.
  • Helper Class: class helping another class. Can have multiple instances and instances variables.

One thing to notice is that using a class in a Static way means no class instantiation and use of Stack memory instead of Heap Memory. This will bring a slightly less overhead because of compile time binding.

Java toString(), equals() and hashCode() of a custom object

Let’s assume that we have a class Pair with two fields and we want to print a Pair instance object. Once we call the print method we will obtain something like Pair@10a5

class Pair<A, B> {
    A first;
    B last;
    
    public Pair(A first, B last) {
        this.first = first;
	this.last = last;
    }
    public A getFirst() {
        return first;
    }
    public void setFirst(A first) {
	this.first = first;
    }
    public B getLast() {
	return last;
    }
    public void setLast(B last) {
	this.last = last;
    }
}

That’s because in java every class derives from Object class and every time we print an instance of a class the default toString from Object class is called. The default implementation is composed of two main parts Type and HashCode. So for our Pair@10a5 we have the Type = Pair and the hashCode = 10a5.

public String toString() {
   return getClass().getName() + "@" + Integer.toHexString(hashCode());
}

If we want to print something with a more clear representation we need to override the toString method in the Pair class.

@Override
public String toString() {
    return "Pair [first=" + first + ", last=" + last + "]";
}

In this way from the main of our class we can have ArrayList of Pair and print it. For each instance the overridden toString() method will be called instead of the one from the Object class.

public static void main(String[] args) {
   List<Pair<Long, Long>> pairsList = 
           Arrays.asList(new Pair(100L, 200L), new Pair(300L, 400L));
   System.out.println(pairsList);
}
-- > output 
[Pair [first=100, last=200], Pair [first=300, last=400]]

Another interesting thing we need to take in consideration are the equals and hashCode methods.

Let’s assume that we have a Set of Integer and we add the number “1” twice. The second add it’s not performed because the Set data structure detects that there is already a number “1” inserted.

We would expect that the same would happen if we had a Set of Pair object, right? But in the second case we are able to add both Pair even if they are equals.

Set<Integer> intSet = new HashSet<Integer>();
intSet.add(1);
intSet.add(1);
System.out.print(intSet);

--> output 
[1]

Set<Pair<Long, Long>> pairList = new HashSet<Pair<Long, Long>>();
pairList.add(new Pair(100L, 200L));
System.out.print(pairList);

--> output
[Pair [first=100, last=200], Pair [first=100, last=200]]

This happens because in order to compare if two elements are equal the default equals and hashCode method from Object class are called. The Default implementation of these method will tell us:

  • equals(Object obj): if an object passed as argument is “equal to” the current instance and as default two objects are equal if and only if they are stored in the same memory address.
  • hashcode(): returns an integer representation of the object memory address. By default, this method will return a random integer that is unique for each instance and might change is we run multiple time the same application.

In order to make our Set understand how to deal with Pair object we need to override the equals and hashCode method in our Pair class. The complete implementation of our Pair class

class Pair<A, B> {
    A first;
    B last;

    public Pair(A first, B last) {
	this.first = first;
	this.last = last;
    }
    public A getFirst() {
	return first;
    }
   public void setFirst(A first) {
	this.first = first;
   }
   public B getLast() {
	return last;
   }
   public void setLast(B last) {
	this.last = last;
   }
   
   @Override
   public String toString() {
	return "Pair [first=" + first + ", last=" + last + "]";
   }
   
   @Override
   public int hashCode() {
	final int prime = 31;
	int result = 1;
	result = prime * result + ((first == null) ? 0 : first.hashCode());
	result = prime * result + ((last == null) ? 0 : last.hashCode());
	return result;
   }
   
   @Override
   public boolean equals(Object obj) {
	if (this == obj)
		return true;
	if (obj == null)
		return false;
	if (getClass() != obj.getClass())
		return false;
	Pair other = (Pair) obj;
	if (first == null) {
		if (other.first != null)
			return false;
	} else if (!first.equals(other.first))
		return false;
	if (last == null) {
		if (other.last != null)
			return false;
	} else if (!last.equals(other.last))
		return false;
	return true;
    }
}

Now if we ran again our main method we will only see one of the pair.

Set<Pair<Long, Long>> pairList = new HashSet<Pair<Long, Long>>();
pairList.add(new Pair(100L, 200L));
System.out.print(pairList);

--> output
[Pair [first=100, last=200]]

Palindrome with Java 8 and Java Posix Classes

There are different way to write a method to check if a Sentence is a palindrome. One interesting way it’s using Java 8 and the Posix character classes( at least for US-ASCII)

Assume that we have a sentence like “Was it a car or a cat I saw?”. We can replace all symbols that are not to be considered and lower case everything. Then using IntStream in the range of half of the size of the sentence go and check if first and last character match.

   public boolean isPalindrome(String text) {
    String temp  = text.replaceAll("\\P{Alnum}", "").toLowerCase();
    return IntStream.range(0, temp.length() / 2)
      .allMatch(i -> temp.charAt(i) == temp.charAt(temp.length() - i - 1));
    }

Spring Bean Singleton Scope

In this post I’m going to implement a small demo to show the behavior of the Singleton Scope applied to a Bean in a Spring Boot Application. Before doing that let’s think about what beans in the Spring world are.

The beans are the backbone of an application. They are objects instantiated, assembled and managed by a Spring IoC container of which the ApplicationContext interface is responsible for.

The scope of a bean defines the life cycle and visibility of that bean in the contexts in which it is used. The latest version of Spring framework defines 6 types of scopes:

  • singleton
  • prototype
  • request
  • session
  • application
  • websocket

For now I’m going to focus on the first one Singleton Scope. Using singleton scope (the default scope) the container will create a single instance of that bean and all request for that bean will return the same object. That means that all modification will be reflected in all references to that bean.

Let’s create from an Address, a Customer and an Employee entity.

Class Diagram

Let’s also define the @Configuration annotated class, where to specify the initialization of the Customer and Employee bean to use the Singleton Bean Address.

@Configuration
public class Config {
	@Bean
	@Scope("singleton")
	public Address personSingleton() {
		return new Address();
	}

	@Bean
	public Customer customer(Address address) {
		Customer customer = new Customer();
		customer.setAddress(address);
		return customer;
	}

	@Bean
	public Employee employee(Address address) {
		Employee employee = new Employee();
		employee.setAddress(address);
		return employee;
	}
}

If we execute this Junit Test we can see that the hashCode for these 2 objects is the same and that if we change the value of one of the Address fields both reference to the Address beans will have the updated value as well as all objects that use that reference of the bean.

@SpringBootTest
class ScopeDemoApplicationTests {
	private static final String CITY = "San Francisco";

	@Autowired
	private ApplicationContext context;

	@Test
	public void givenSingletonScope_whenSetName_thenEqualNames() {

		Address personSingletonA = (Address) context.getBean("personSingleton");
		Address personSingletonB = (Address) context.getBean("personSingleton");

		Customer customer = (Customer) context.getBean("customer");
		Employee employee = (Employee) context.getBean("employee");

		personSingletonA.setCity(CITY);
		Assert.assertEquals(CITY, personSingletonB.getCity());

		Assert.assertEquals(personSingletonA.hashCode(),
                                    personSingletonB.hashCode());

		Assert.assertEquals(customer.getAddress().hashCode(),
                                    employee.getAddress().hashCode());
	}
}

The code for this example is available in GitHub.

Spring @RestController vs @Controller

To understand the difference between @RestController and @Controller we can think about the main difference between a REST API and a Web application. The response of a REST API is generally JSON or XML; in a web application, instead, the response is usually a view (some html + css) intended for human viewers.

This is also the main difference between @Controller and @RestController annotation. Basically in a spring mvc @Controller the handler method returns the response “view name” which is resolved to a view technology file (e.g. JSP) and the parsed view content is sent back to browser client. It just create a map of the model object and find a view. If we want instead to bundle the return value yo a web response body we can use the @ResponseBody annotation and no view resolver is needed.

For example assuming that we have a view and a greeting Api in a MVCController that take a param as input and return a view we can use @Controller annotation

// Path of view template
/src/main/resources/templates/greeting.html

@Controller
public class MVCController {

    @RequestMapping("/greeting")
    public String greeting(@RequestParam(name = "name", required = 
              false, defaultValue = "World") String name, Model model) {
        model.addAttribute("name", name);
        // We can return a view name that is present in 
        return "greeting";
    }
}

The @RestController simply returns the object and object data is directly written into HTTP response as JSON or XML. One notice is that in Spring MVC the @RestController annotation is a combination of @Controller and @ResponseBody annotation.

@Controller
@ResponseBody
public class MVCController {
  // your logic
}

@RestController
public class RestFulController { 
  // your logic
}

List to int[] in Java

How to convert a List<Integer> to a int[] in Java 8? Using Java 8 collections stream() function and then mapping to ints, we get an IntStream. With the IntStream we can call toArray() which gives us the int[]

public int[] toIntArray(List<Integer> list){
   return list.stream().mapToInt(Integer::intValue).toArray();
}

From bash to zsh…git and prompt configuration

After a really long journey I decided to retire my long-lasting and trustworthy companion, my 2012 MacBook Air. I spent quite some time to decide which new model to buy; in the end the presence of the touch bar made me avoid all other models and going for the latest 2020 MacBook Air.

I didn’t want to use one of my time capsule backup but have a new clean env to setup and so first thing first: git, bash-completion and customization of the prompt on zsh shell on macOs Catalina. I used brew to do it.

brew install git bash-completion

And then to make the completion available in zsh as suggested by homebrew website you must get the Homebrew-managed zsh site-functions on your FPATH before initialising zsh’s completion facility, so I added the following in the ~/.zshrc file:

if type brew &>/dev/null; then
  FPATH=$(brew --prefix)/share/zsh/site-functions:$FPATH
  autoload -Uz compinit && compinit
fi

Compinit was complaining about insecure directories, so I listed the insecure directory and added the correct permission for those.

zsh compinit: insecure directories, run compaudit for list.
Ignore insecure directories and continue [y] or abort compinit [n]? 

compaudit

This is because those folders are group writable, so I changes it:

compaudit | xargs chmod g-w

I do like do see in my prompt both the user and the machine name, the path I’m on and if it’s a git repository the branch name and adding some color. Next step will be adding some more icon to show the status of the git repository.

# Load version control information
autoload -Uz vcs_info
precmd() { vcs_info }

# Format the vcs_info_msg_0_ variable
zstyle ':vcs_info:git:*' formats '(%b)'

autoload -U colors && colors

# Set up the prompt (with git branch name)
setopt PROMPT_SUBST
PROMPT='%n@%m %F{green}${PWD/#$HOME/~}%f %F{yellow}${vcs_info_msg_0_}%f > '
zsh custom prompt
work in progress of my zsh prompt customization

Chiacchierino, tatting, frivolité…

“Handmade” is something that has been part of me since I have been a little girl, almost written in my DNA.

My grandmother used to spend long afternoons with a needle in her hand sitting at her old Singer sewing machine; My mom was always ready to knit slippers or wool scarfs; She had paper, cardboard, scratch paper, scissors, colors ready for little homemade works … together we used to prepare all the homes and pieces for the Nativity (Presepe) with recycled boxes and acrylic painter.

My sisters and I started with the cross-stitch when my grandmother gave us as gifts linen towels to embroider for our dowry. From that first cross-stitch work, we continued on with the crochet, the knitting and the wood, the paper, the Das … also passing by the kitchen with pasta and pizza … even the belly wants its part 🙂

Each period of my life has had a bit of a “season”. There was crochet, origami, quilling, knitting, recycled paper, sewing (although I still need a lot of work there 😀 ) often all together. Something that has always made me a little bit afraid was tatting, chiacchierino, frivolité depending on which language you want to use.

In the last year I started experimenting with this old art with results not always up to the standards (too high) that I have always fixed on me.

Tatting lavender sachet bag

I started with small things. Small bags of lavender, a sachet bags to put in the drawers. They sums the things I love to do and something new: Tatting… At the moment I have completed the small bags and they smell good 🙂

lavender sachet bag, tatting and cross stitch

Lavender sachet bag, tatting and cross stitch

Lizbeth thread size 40

Lizbeth thread size 40

In this period of extreme hot weather thinking about Christmas makes me feel better. I decided to try a new colored thread and I chose a new brand: Lizbeth.

I searched and found a very nice and professional Etsy shop CustomCottonEtc and I started to order my supply of cotton. My cart is already overwhelmed for the next order 🙂

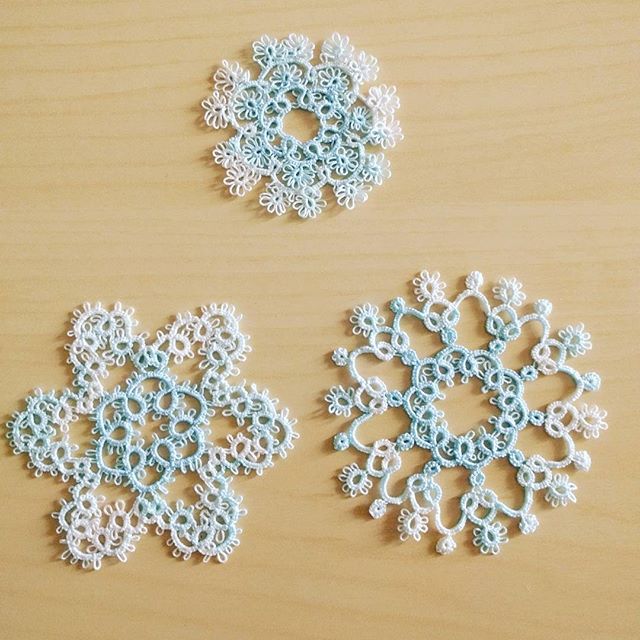
Tatting snowflake Lizbeth thread size 40

Tatting snowflake Lizbeth thread size 40

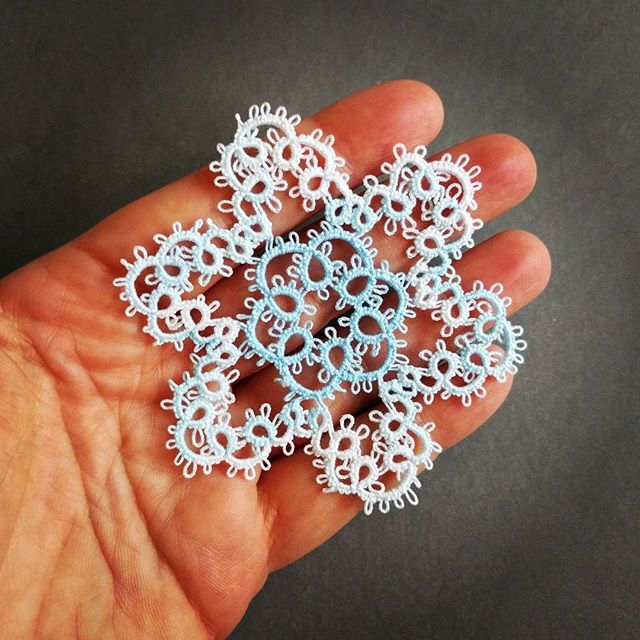
With these colors I have in mind so many projects. First of all: Snowflakes!!!!  I have already started with a whole series of different size of snowflake.

They will be a good Christmas Tree Ornament and then…I’m already thinking about other projects…maybe something to practice my sewing skill 🙂

Tatting snowflake Lizbeth thread size 40

Tatting snowflake Lizbeth thread size 40

3d printed home gadgets.

After trial and errors I’ve finally managed to print some small gadgets with my micro 3d printer. Personalized gadget very useful to use at home.

When I bought the printer I choose to buy two spool (ABS white and blue). But since I started printing I found it very difficult to let the material stick to the surface of the printer. I tried printing with support material, with different temperatures, adding scotch tape at the surface, but nothing worked for me. After searching on the web I found out that without a warm bed it’s very difficult working with ABS and so I decided to buy a PLA spool that I use with externally. I set the temperature at 215 degree and with a tape on the surface.

3d printed cell holder

3d printed cell holder

The first object I printed was a phone holder. I printed with low quality and from a design I downloaded from the web. As soon as I realized the printer worked well I started with a personal design.

desk holder

Desk holder

Desk holder

Desk holder

This is a desk holder I printed in medium quality. It seems to work well even if it’s not so strong. I’ve adjusted the printing setting to high quality and high density. With these settings the printer  use more filament, the object weights more but is more strong.

For example this is the door hanger I printed in high quality and density. It took 7/8 hours to complete but it’s really good, strong and resistant.

Door hanger.

Door hanger.

Finished door hanger

Finished door hanger

So. I’m having fun with material, temperature, design of small objects. The next step will be trying with a different design. It’s really early but my mind is already thinking about Christmas 😀